
Takeoff, Flight and Landing
When selecting a flying location, choose an area away from buildings and spectators where IRIS+ does not pose a risk to bystanders and will not fly over people. Remember to bring a fully charged battery, a wrench for tightening propellers, and the flight checklist.
Preflight Preparation
Ensure the propellers are tight and your camera is secured to the mount. Place IRIS+ in a designated launching location before takeoff with the blue front arms facing away from you. Ensure that this is a level surface. This is known as the home position and will be stored by the autopilot as the location IRIS+ will return to when executing a return-to-launch command. It is therefore advisable to ensure that the home position is free of obstructions and can provide a clear landing path. Do not use your staging area as the home position.
Ensure the propellers are tight and your camera is secured to the mount. Place IRIS+ in a designated launching location before takeoff with the blue front arms facing away from you. Ensure that this is a level surface. This is known as the home position and will be stored by the autopilot as the location IRIS+ will return to when executing a return-to-launch command. It is therefore advisable to ensure that the home position is free of obstructions and can provide a clear landing path. Do not use your staging area as the home position.
Step 1: Check the IRIS+
|
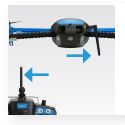
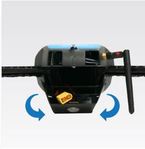
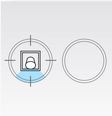
Point the controller antenna up and the IRIS+ antenna down for the strongest signal.
|

|
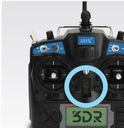
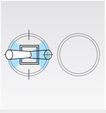
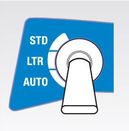
Set the mode switch to standard (STD). If you’re new to flying, try starting your first
flight in loiter (LTR) instead of standard. |
|
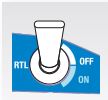
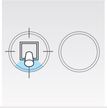
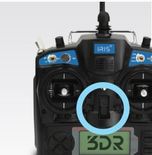
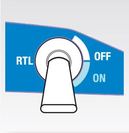
Ensure that the RTL switch
is set to OFF. |
Step 2: Power on the RC controller
|
Ensure that the controller is always turned on while IRIS+ is powered. If IRIS+ loses communication with the controller in flight, IRIS+ will initiate an automatic return to launch.
|
|
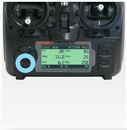
Press and hold the DN button on the controller to view flight data from IRIS+. See the Flight Checklist for more information about controller flight data.
|
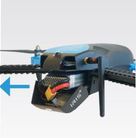
Step 3: Connect the battery
|
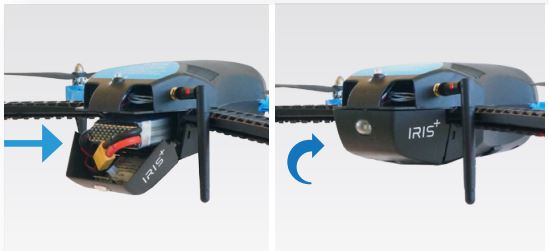
Press the sides of the battery compartment together and rotate the door down.
|
|
Insert battery, and attach the yellow connectors. To close, squeeze the door, and rotate up until it clicks into place, ensuring that the battery cables do not
interfere with the LED cables. |
|
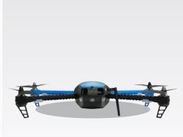
Place IRIS+ at the launch point with the black arms facing towards you and the blue arms facing away from you.
|
|
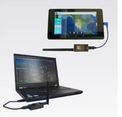
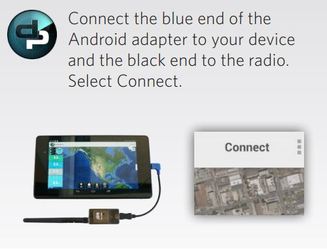
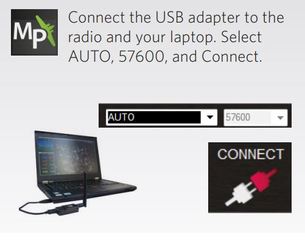
Connect the radio to your ground station, and select Connect.
An optional ground station lets you view live data in flight and unlock IRIS+ advanced autonomous features. To download a ground station app for you laptop or Android device, visit 3dr.com/iris/info |
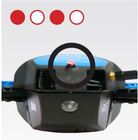
Step 4: Press the safety button
|
Press the safety button until it is solid red. IRIS+ is now live and so make sure to stand back!
Caution: Do not handle IRIS+ while the safety button is solid red and IRIS+ is live. Always press the button until it displays blinking red before approaching the propellers. |
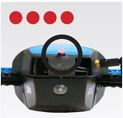
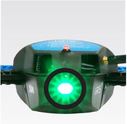
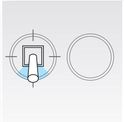
Step 5: Check the LED light
|
Check the LED to view the status of IRIS. Wait to proceed until you see the blinking green light indicating that IRIS has acquired GPS lock.
|
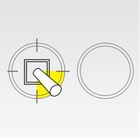
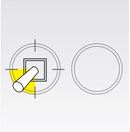
Step 6: Arm the motors
|
To activate the motors, hold the left stick down-right until the motors spin. Now you’re ready for takeoff!
Caution: IRIS+ will spin its propellers when armed. Ensure that the launch point is clear of obstructions before arming. Always disarm the motors before approaching IRIS. |
|
This is a small sound clip of the noise that IRIS+ produces when it is armed.
|
Quick guide to the different lights on IRIS+

|
When the safety button is blinking, the motors are inactive and the copter is safe to handle.
|

|
When the safety button is a solid red, the motors are active and you must deactivate before handling.
|

|
When the LED light on the back of IRIS+ is blinking red and blue, then the copter is initializing, please wait.
|

|
When it is blinking blue, IRIS+ is acquiring a GPS signal, please wait.
|

|
When the LED light is blinking green, the GPS signal has been locked and the autopilot is ready.
|

|
When the light follows this sequence, an error has occurred, disconnect battery and restart preflight procedure. See the troubleshooting guide at 3dr.com/iris/info
|
Failsafes

|
This sequence indicates a loss of radio control signal. Always use the controller as a primary or backup control system when flying. Ensure that the controller is turned on any time IRIS+ is powered. If contact with the controller is lost during flight, IRIS+ will land and display a blinking yellow LED. If IRIS+ is more than 2 meters (6.5 feet) from the launch point, it will return to launch (RTL) before landing.
|

|
This sequence of lights indicate that there has been a loss of GPS signal. IRIS+ requires an active GPS signal before takeoff. If IRIS+ loses GPS signal in flight, it will trigger a GPS failsafe, indicated by a blinking blue and yellow LED with a
high-high-high-low tone, and automatically switch to manual control (standard - altitude hold mode). Always be prepared to regain manual control of IRIS+ at any time while flying and choose an unobstructed flying area to improve GPS signal strength. When flying a mission, we recommended changing the GPS failsafe behavior to land. (Visit 3dr.com/iris/info for more information about configuring the GPS failsafe.) |

|
When the battery reaches 25% of its remaining charge, IRIS+ will land and display a blinking yellow LED with a quick repeating tone. If IRIS+ reaches the low battery limit during a mission, it will return to the launch point before landing.
|
|
An example of the tone emitted by IRIS+ when the battery charge is low.
|
In Flight
|
Take off and gain altitude by raising the left stick slightly above centre.
|
|
Set the left stick to centre to maintain the current altitude.
|
|
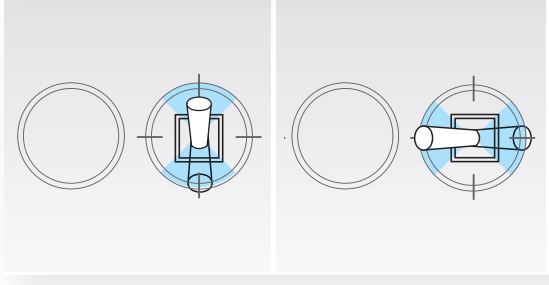
Rotate counter-clockwise and clockwise by moving the left stick left and right.
|
|
Fly forward, backward, left, or right by moving the right stick in the direction you want to fly.
|

|
Release the right stick to level IRIS+.
|
|
Lower the left stick below centre to descend.
|
|
Set the left stick fully down to land once IRIS+ is a few inches above the ground. |
Note: IRIS+ is a powerful and agile flier. Move the sticks in small increments until you feel comfortable with how IRIS+ responds to controls.
Postflight
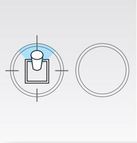
Step 1: Disarm the motors
|
After landing, hold the left stick at the bottom left until the motors stop spinning.
|
|
A sound clip showing what noise to expect when IRIS+ is disarmed.
|
Step 2: Press the safety button
|
Press the safety button until it displays blinking red to make IRIS+ safe to handle.
|
Step 3: Disconnect the battery
|
Make sure to disconnect the battery as shown.
|
Step 4: Power off the controller
|
Now all you need to do is power off the controller and your first flight is now complete!
Follow the steps shown here and on the Flight Checklist every time you fly. |
Tips for first time fliers
Practice these exercises to help you master flight controls.
Skill 1: Hover
Your first step is to maintain a consistent altitude while keeping IRIS+ oriented so the black arms face towards you and the blue arms face away from you. Practice taking off, rising to a comfortable hovering altitude, and keeping IRIS+ in place without allowing for any changes in orientation or position. If IRIS+ drifts forward, backward, left, or right, or rotates clockwise or counterclockwise, use the corresponding stick controls to correct.
Skill 2: Box
When you feel comfortable with your ability to maintain a consistent hovering altitude, try flying a box pattern. To practice this, take off, reach your hovering altitude, then fly forward, right, backward, and left by making small adjustments to the right stick. Make sure to fly the box in front of you and not around you. Use the left stick to rotate IRIS+ so the black arms face towards you and blue arms face away from you for the duration of the exercise.
When you feel comfortable with your ability to maintain a consistent hovering altitude, try flying a box pattern. To practice this, take off, reach your hovering altitude, then fly forward, right, backward, and left by making small adjustments to the right stick. Make sure to fly the box in front of you and not around you. Use the left stick to rotate IRIS+ so the black arms face towards you and blue arms face away from you for the duration of the exercise.
Skill 3: Figure Eight
When you can confidently navigate a box while maintaining altitude and orientation, try flying a figure-eight pattern. Once again, make sure to fly the figure eight in front of you and not around you. Use the right stick to create a smooth flight path while using the left stick to correct orientation and maintain altitude.
When you can confidently navigate a box while maintaining altitude and orientation, try flying a figure-eight pattern. Once again, make sure to fly the figure eight in front of you and not around you. Use the right stick to create a smooth flight path while using the left stick to correct orientation and maintain altitude.
Planning Missions
To plan a mission, download a ground station application from 3dr.com/iris/info, and install onto your laptop or Android device. Choose the one appropriate for you from those shown just below.

Step 1: Power IRIS+, connect the radio to your laptop or Android device, and select Connect.
|
|
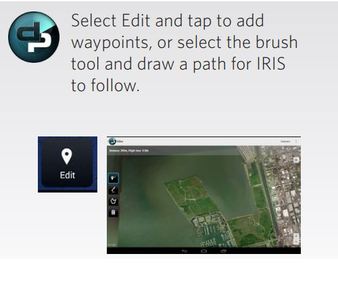
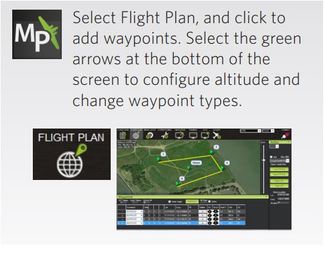
Step 2: Configure waypoints.
|
|
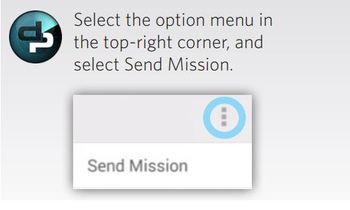
Step 3: Save the mission to IRIS+.
|

|
When flying missions, it is recommend to change the GPS failsafe behavior to set IRIS+ to land in the event of a loss of GPS signal. For instructions, visit 3dr.com/iris/info.
Flying Missions
|
Step 1: Perform a pre-mission test flight.
Fly a brief test flight to verify that all controls (throttle, yaw, roll, and pitch) are responding normally. |
Step 2: Arm IRIS+ in standard mode.
When you’re ready to start the mission, arm IRIS in standard (STD). |

|
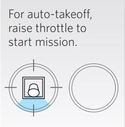
Step 3: Switch to AUTO.
|
If you planned a takeoff waypoint into your mission, switch to AUTO on the ground, and raise the throttle to initiate the mission. If you did not add a takeoff waypoint, switch to AUTO mode after takeoff to initiate the mission in flight.
|
|
|
To recall IRIS during a mission, use the controller to switch to standard (STD) and land manually. Or switch to RTL, and automatically return to the launch point.
Caution: To avoid sudden changes in altitude when switching from auto to standard (STD), ensure that the left stick is set to the center position. |
Step 4: Switch to standard before disarming.

|
When the mission is complete and IRIS has landed, use the controller to switch to standard (STD) then disarm and proceed with the postflight steps.
If you added an automatic landing waypoint to your mission, IRIS will disarm automatically after landing. |
Full Autonomy
|
Engage the autopilot’s navigation control and fly using a series of waypoint commands. When switched into full autonomy (AUTO) mode, IRIS+ executes the mission stored on the autopilot and heads for the first scripted waypoint. Waypoints are GPS-positioned points in 3D space with a latitude, longitude, altitude, and radius. A waypoint can be a simple navigation command (go here), or it can include a command to takeoff, land, loiter (for a designated time period, number of turns, or indefinitely), or execute an RTL. Plan, save, and write waypoints by connecting IRIS+ to Mission Planner using the telemetry radio. Auto mode can be engaged for takeoff and landing if takeoff and land waypoints have been scripted into the mission. For more information on using Mission Planner for configuring full autonomy, visit the online documentation here.
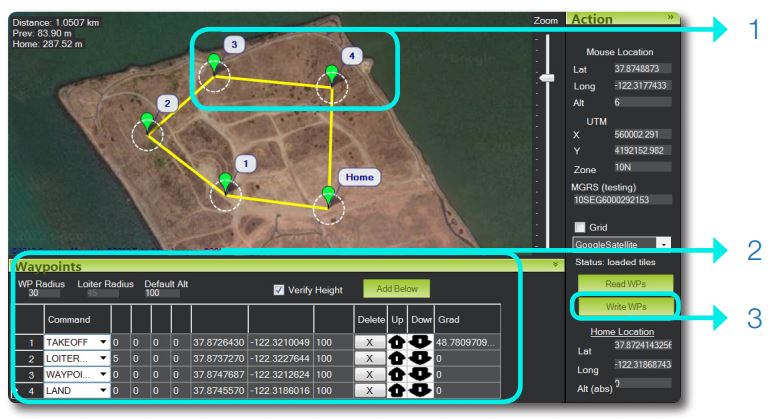
Pre-configure waypoints in Mission Planner’s Flight Plan screen
|
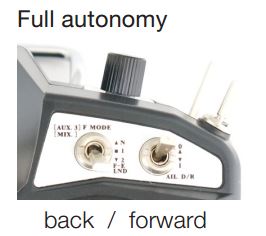
Switch Position
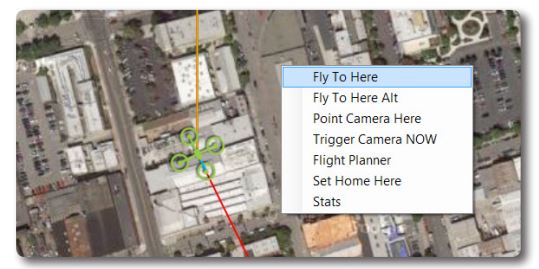
Command waypoints in flight using the Flight Data map
In Mission Planner, right-click on the point on the flight data map where you would like to create a waypoint, and select Fly to Here to create a guiding waypoint at the current altitude or Fly to Here Alt to select a new altitude for your guided waypoint.
Fly to Here creates a waypoint at the current altitude and immediately
sends Iris there. If you select Fly to Here Alt, Mission Planner will prompt you for an altitude (in meters) before sending Iris to that point. |