
IRIS+ Overview
IRIS+ is the new update of the IRIS autonomous quadcopter with many of the same features but with some differences. As with the IRIS, the IRIS+ is a personal aerial video platform powered by open-source UAV hardware, software, and firmware.
|
|
|
Main Differences between the IRIS and the IRIS+
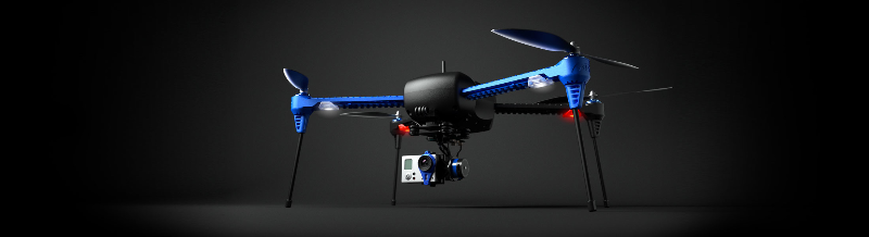
The most significant difference with this new model is in the new and improved flight times. Without the camera and gimbal, flight times can reach up to 22 minutes whereas if you include these apparatus, this time is reduced to 16 minutes (still significantly better than the previous time of 12 minutes).
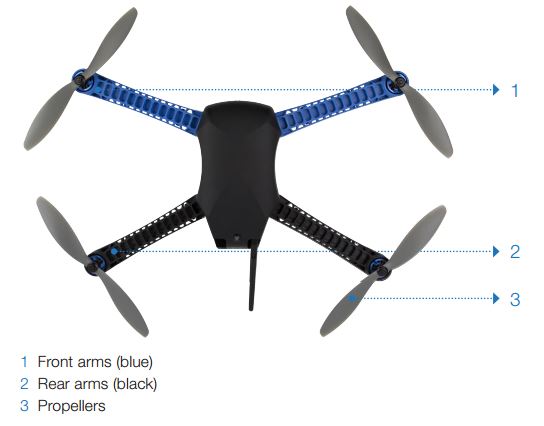
As you can tell from the picture above, there have also been some design advancements in this model. Notably, there is now an additional set of long legs for secured ground clearance when carrying the camera and gimbal combination. Lighter arms and legs also provide better flight control along with the improved power system including new motors.
Other notable features include advanced '3PV' Follow Me technology, vivid LED's on all arms for trouble-free directional awareness and on-screen telemetry for flight status in real time.
IRIS+ Propellers
|
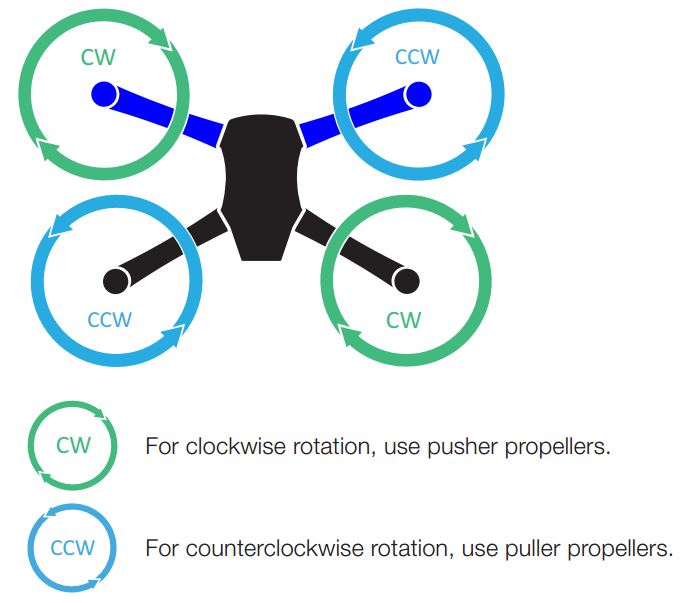
IRIS+ creates lift using two 10 inch pusher propellers (marked SFP or P) and two 10 inch puller propellers (marked SF or unmarked). Pusher propellers spin clockwise on the front-left and back-right motors; puller propellers spin counterclockwise on the front-right and back-left motors.
|
|
|
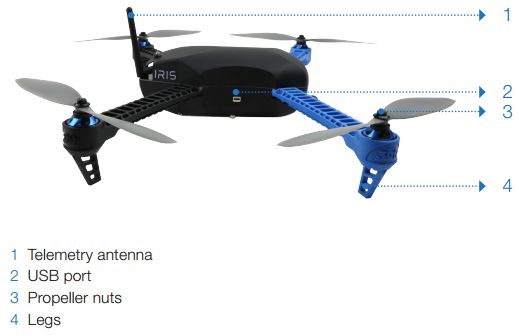
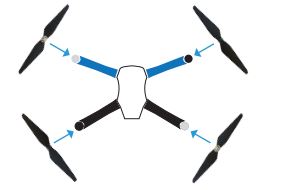
With the new IRIS+, the propellers and motors are colour-coded for ease of attachment. Two of them are with black nuts, and so attach to the motors with the black tops, and the other two have silver nuts, attaching to the motors with the silver tops. No mix-ups possible.
|
|
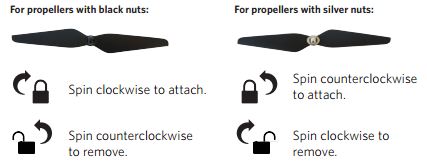
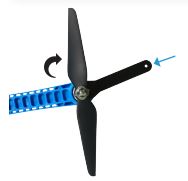
Attaching the propellers is also made easier with the IRIS+. Each propeller has locking and unlocking direction symbols. To attach,
spin the propeller in the direction of the locking symbol. The propellers will automatically tighten onto the motors when you arm IRIS+ before takeoff. |
|
|
To remove, hold the motor in place with the propeller tool, and spin the propeller in the direction of the unlocking symbol. |
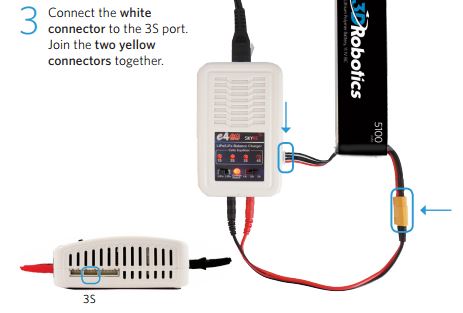
Connecting and Charging the IRIS+ Battery
|
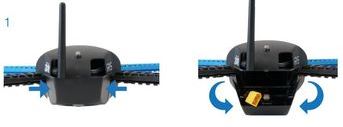
1. Press the sides together and rotate down. |

|
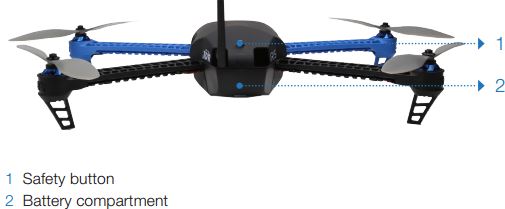
2. Insert the battery into compartment and connect the yellow XT60 connectors. To close, squeeze the door and rotate up until it clicks into place.
|
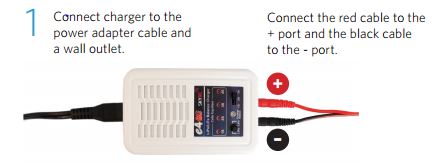
The IRIS+ uses a rechargeable lithium polymer (LiPo) battery. The guide above shows clearly how to open up the battery compartment of the IRIS+ and how to connect the battery.
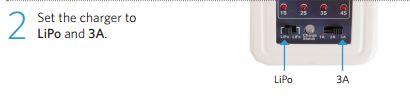
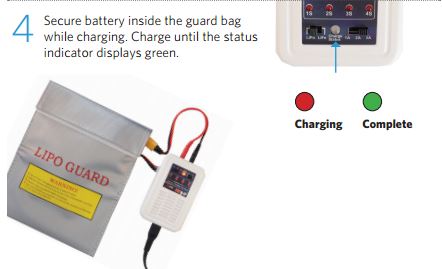
Store your battery at half charge then charge completely the day before flying. Batteries also ship at half charge, so please charge the battery completely before your first flight. Each full battery provides between 16 and 22 minutes of flight time, depending on load.
|
|
|
|
Multicopter Safety
|
Flying
|
Battery
|